The last (midships) section of the aft cabin bulkhead is epoxied into place – there is no access to the lazarette now except from the cockpit deck hatches – which is the usual arrangement. As can be seen in the photo below of the “before” condition, there are/were two 28″ x 34″ hatches caulked into place so as to keep 95% of the rain water out of the lazarette – refer to previous posts for an explanation.
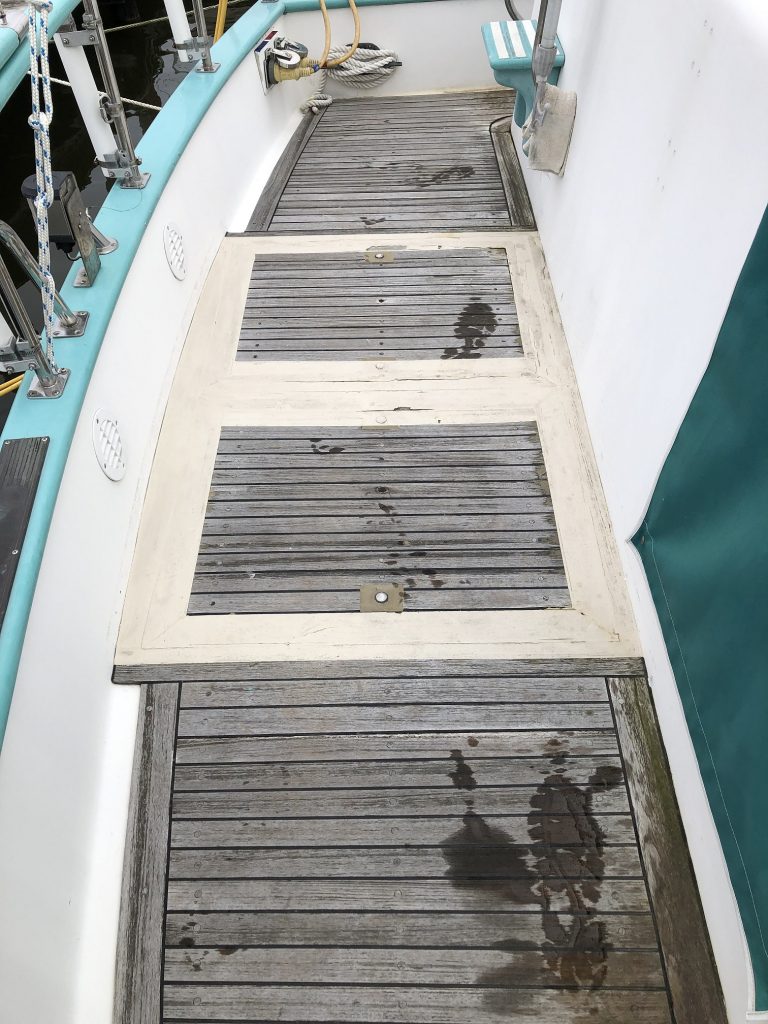
Now, the port side hatch is freed from the caulking, and equipped with a 0.070 thick by 3″ wide mitered corner flat aluminum molding around the perimeter that overlaps the deck by 1″ all around. Hinges (opening aft) and a lift ring are installed. The starboard hatch is left caulked into place.
When you first look at the cockpit, you see two big hatches and think “wow – plenty of access!” But later you realize that, because the aft cabin protruded 50% of the way into the lazarette, the builder had to provide two hatches for enough room for a person to get into and out of the narrow lazarettte. Twice as much potential for rain leaks – twice as much hatch gutter as was needed.
In the photo below, you can see the two new hatch gutter drains installed for the port side (opening) hatch. White vertical surface at top is the aft exterior of the aft cabin. This photo was taken before the midships bulkhead piece was epoxied into place. The saw edge surface is where the rain water leak diverter started – just aft of the hatch gutter (gutter is retained). The diverter continues to the right, under the starboard hatch, and will likely be abandoned in place. Now that there are gutter drains at the lowest edge of the gutter, any water that escapes the caulking will drain away correctly. The 28″ x 34″ opening under the port hatch is plenty big.
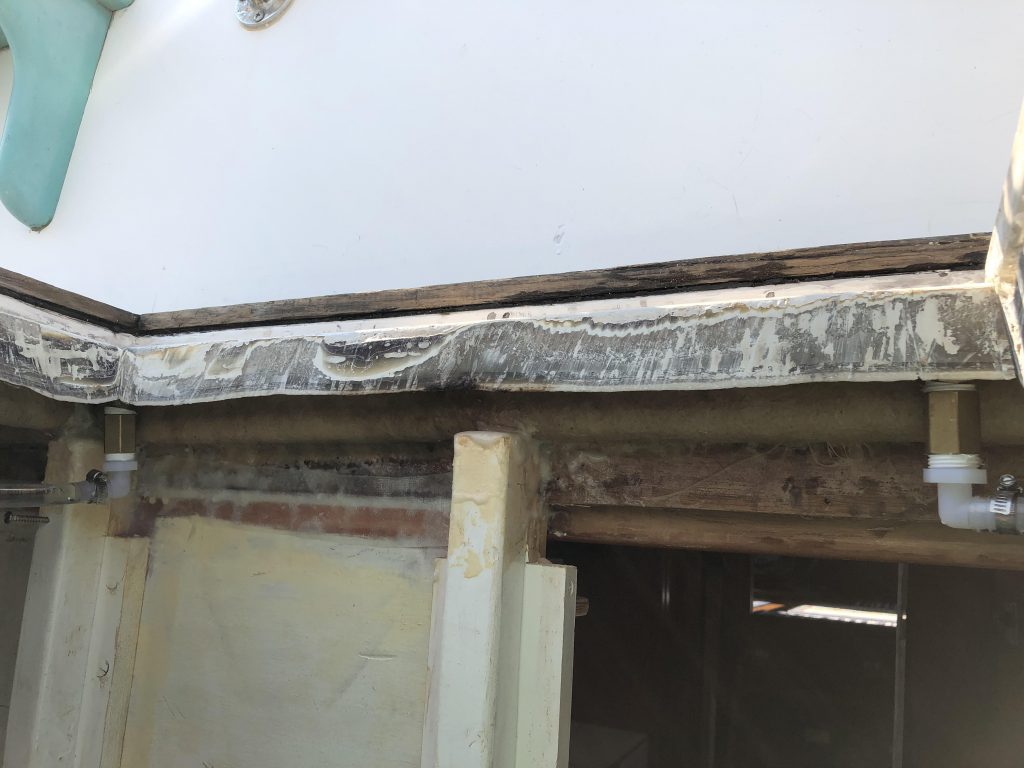
For each of the new drains, I drilled a 13/16″ hole straight down to the lazarette starting at the low point of the gutter through the gutter frame. I epoxied a 2″ x 1/2″NPT brass pipe nipple (tap/press fit from below) into the hole with the top of the nipple flush with the bottom of the gutter. Tape the bottom threads and remove the tape when the epoxy is green – otherwise the epoxy will slide down and contaminate the bottom threads. You can just see the (thread tape on the) bottom of the nipples where they thread into the brass coupling – a nylon 1/2″ tubing by 1/2″ NPT male adapter finishes the connection to the clear vinyl tubing to the existing through-hull fittings at the transom. We had a good rain Sunday 8/1/2021, and on Monday there was not one drop of water in the lazarette. Some residual water was in the gutters.
Below is a photo showing the rain diverter edge. They used enough material and labor in this stop-gap “fix” to shop modify the hatch gutters to work correctly in the first place. Solid mat and resin almost 56″ wide 2 1/4″ thick at front tapering to 1/4″ over 16″ rearward. You can see the left edge of the starboard hatch, the teak cockpit deck edge, the fiberglass deck edge below the teak, and one new drain.
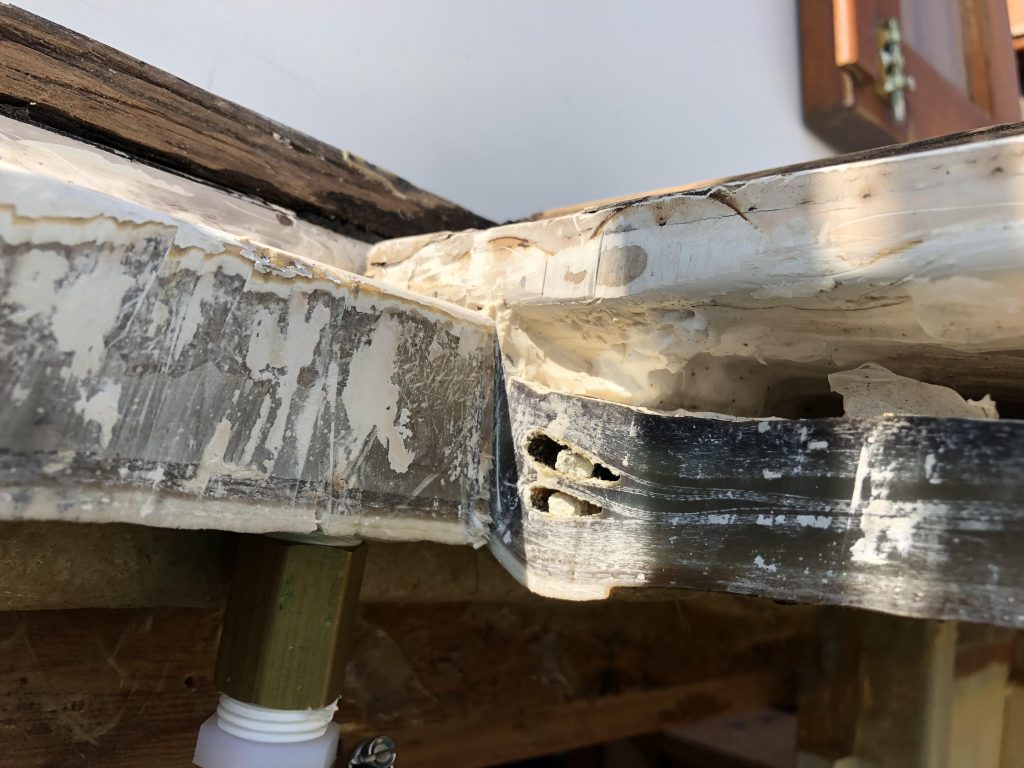
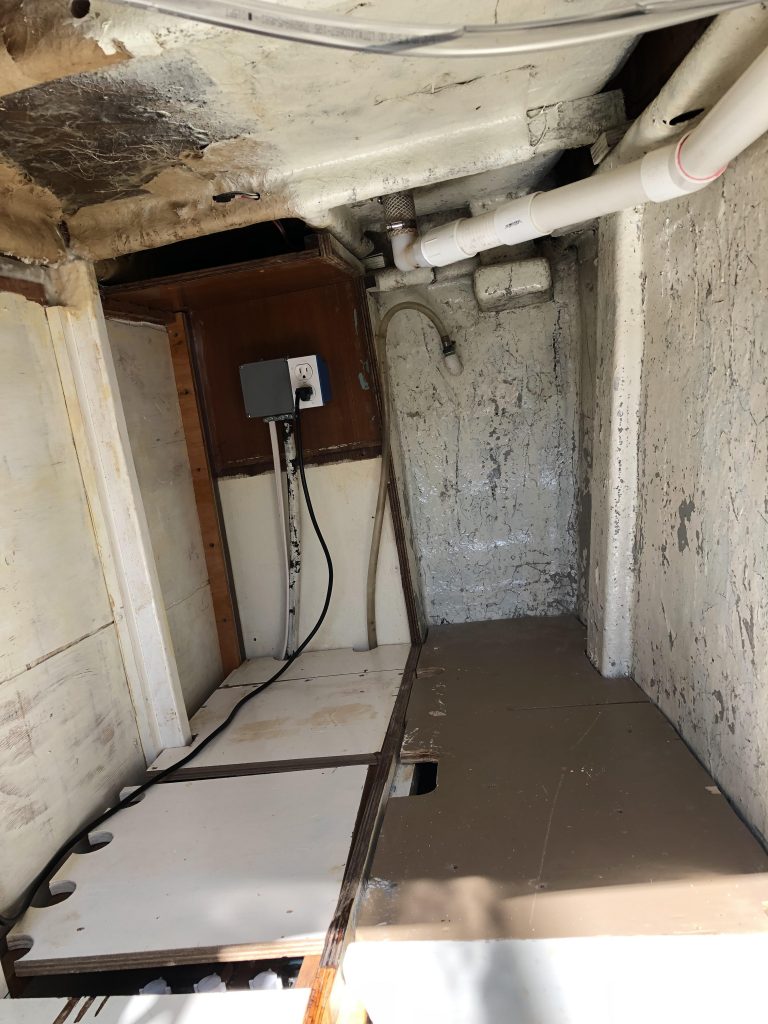
Photo below shows the “new” lazarette, view to starboard/transom to the right. Bone dry and room to move. Paint job needed – finished otherwise. The lazarette is vented (inverter battery banks) via round vents in the cockpit bulwark – the airflow path up to these vents is the gap shown at the upper right corner.
Finally, looking aft, the photo below previews what the aft cabin will look like when finished.
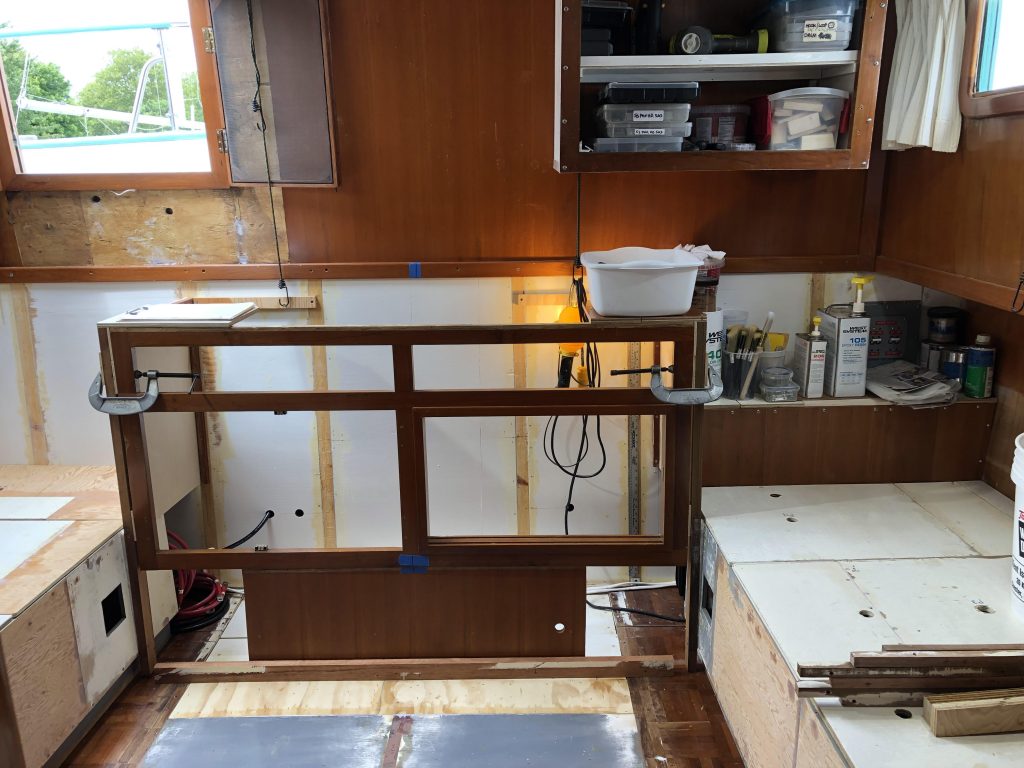
Shown are both the starboard and port berths, the center cabinet (cabinet front and sides) with lower shelf to port, and the cupboard, high on the aft wall to port. The vertical panel below the cabinet front is for the electric baseboard heater. The 3KW inverter and AC/DC circuit breakers will be located in the space below the cabinet front – vents at left and right with other vents in cabinet sides – and cabinet doors are louvered. Cabinet top is large enough for the computer printer and some other goodies. Rough space under/beside companionway gets round edge poplar 1 x 2 boards, painted ice blue, with exposed SS screws and finish washers – similar approach at cupboard. The floor has been leveled for installation of carpet.